Living with Food Allergies

14 Jan

I really struggle sometimes with the attitudes of parents to children with allergies, how they talk about allergies, and how they fundamentally misunderstand what it is to live an allergic life. I see this attitude of experience and understanding right alongside huge missteps and pretty offensive behavior. Unless you’ve lived it yourself, you probably don’t understand what it’s like.

To never be able to pick something off a sample tray and just pop it in your mouth.

To spend every party and every event on guard.

To go to a restaurant and play twenty questions about the menu, only at the end to have the sinking feeling that your server doesn’t actually care enough to give you a real answer.

To be excluded from every school pizza party, every slumber party pizza dinner, every “surprise! We bought lunch for everyone!”

To be at a new job, trying to make a good impression on coworkers, only to politely decline a tray of home baked goods and have to fend off diet shaming because “Oh, honey, you’re so thin, you don’t need to watch your weight!” And then suddenly, it’s a defense of allergies and all the searingly personal questions that follow. “How long have you been allergic?” “What’s your reaction?”  “Have you tried Lactaid?” “My friend’s cousin’s brother’s ex-wife used to be allergic to milk, but she outgrew it and now she’s just fine. Have you considered that?”

To be six years old and know you have to be careful, surrounded by tiny little six year old monsters desperate to find any sign of weakness, and have your difference outed publically.

To be chased around the cafeteria with a carton of milk, only to be yelled at by the grown ups for yelling, because secretly, they too think you’re a freak, making it all up, and deserve it.

To spend your entire life knowing that you’ll never be normal. That this tiny little difference which should be oh so insignificant means the world to everyone around you. That you are utterly and forever apart from the world three times a day plus snacks, on social occasions and big celebrations, in every day life, at every moment of every day you are different and not One Of Us.

To watch on organized trips or at summer camp when vegetarians, who eat differently by choice, are given separate meals and different options, but being told with an allergy to make do with just salad or a pbj.

To stare at your own child, covered in hives after eating, and experience this gut wrenching terror that she’ll be doomed to the same childhood of terror and shame and ostracizing, and to put on a good face so as not to scare her or your partner.

To feed your baby something you’ve spent your whole life thinking of as poison, in the interest of “testing” and appeasing societal pressure to make her as normal as possible. And when she has no reaction, to feel guilty when you realize a part of you hoped she would be like you, and you wouldn’t feel so alone.

To bow and scrape and plead with thankfulness when someone deigns to make an exception, to order you a special meal at an event, who actually remembered that you exist. To be utterly grateful at the meager scraps they throw you. And to burst into tears when someone actually goes above and beyond, and to have those memories indelibly etched forever on your conscious.

Like the time we attended a murder mystery weekend, and after a twenty minute conversation with the head chef on Friday night, the following lunch, I was presented with the most beautiful plate of vegan risotto I have ever seen. A veritable mountain of it, and so delicious my companions told me it was better than anything out on the regular buffet.

Like the caterer for my wedding who said it would be no problem at all to make the entire event dairy free in such a way the guests would never even notice.

Like being 25 years old, out of town for my brother-in-law’s wedding, and they took us to a vegan restaurant, where I tasted something as mundane as a Boston cream pie for the first time in my life.

Walking into a new restaurant and telling them I have a dairy allergy, and then bursting into tears in front of the poor server when she presented me with a separate dairy menu, listing everything that was safe for me to eat.

To be nearly thirty years old before feeling like it doesn’t matter how other people define my food.
Coconut Gelatin

23 Mar

We had a lovely brunch at a new Chinese restaurant a couple weeks back, and instead of the orange slices V so looks forward to, they served a coconut milk gelatin that was pretty interesting. Feeling inspired (and desperate for easy snack ideas), I’ve been working on a few homemade jellos. This one turned out pretty good.

The Recipe

In a small saucepan, heat:

  • One can full fat coconut milk
  • 1/4 cup sugar

Meanwhile, combine

  • 2 Tbsp gelatin
  • 2 c. Almond milk (or a second can of coconut milk if you’d prefer)

Whisk in a splash of vanilla. Whisk in the heated milk and stir until the gelatin dissolves. Pour into a greased 9×13 pan and refrigerate several hours until firm. Slice into cubes and serve!

Avocado Pasta

6 Mar

I think this would end up as a good after-Thanksgiving meal, actually. When we go to our favorite barbecue place, we order a little extra smoked turkey to chop up and throw in with whatever we’re cooking, and it goes VERY nicely in this pasta. I think it would also be good with a little crumbled bacon, or maybe use bacon grease in place of the olive oil, or maybe top it with a fried egg. As written, it’s an extremely light meal and totally vegan. Personally, I found it a little too light, but then again, I’m currently breastfeeding two children, so I don’t exactly have a normal appetite.

Any type of pasta works well. We’ve done spaghetti and chunky pasta, and even some of the higher quality ramen noodles. I think with toddlers, chunky pastas are the easiest for little forks.

You can also swap the lime juice for lemon, depending on what you have on hand. And if you have fresh lemons or limes, some zest would not be amiss!

The Recipe

Start a pot of water boiling on the stove. Add:

  • 1 box/bag of pasta

While it cooks, scoop into a food processor or blender:

  • 2 avocados
  • 1-2 tsps lime juice (to taste) or juice of one lime plus 1/2 tsp zest
  • 1 Tbsp olive oil
  • salt

Pulse until smooth. When pasta is cooked, mix the sauce with the pasta and throw in any desired toppings (smoked turkey, crispy egg, bacon crumbles, etc).

Welcome to Local Veggies

21 Feb

For several years, we’ve gotten most of our produce through a CSA. I’ve gotten a bunch of questions about it, so I wanted to share my own experiences.

What is a CSA?

CSA stands for Community Supported Agriculture. Many smart people have explained it better than I can, so I’ll keep this pretty simple. Food is super important to being alive. Farming is hard. I don’t want to be a farmer, but I do want to have good food. So I, as a member of the Community, can Support my local Agriculture by buying local food. It’s really hard to be a farmer, and it’s really risky. CSAs spread that risk to the whole community. We purchase a share/membership/subscription at the beginning of the season, paying in advance for a season’s worth of produce. Then, each week of the growing season, we get a share of the harvest. Simple, right?

Some tips on sharing:

A CSA can be a lot of produce if you’re not the sort of house that cooks with a lot of veggies right now. We’ve never gotten a share all by ourselves. We started off splitting a share among three households, with my grandparents and my mother. Then, we split a share with just my mom while we were living with my grandparents, and then we just split a share with my mom.

There’s a bunch of ways you can split a share, some better than others. Some people alternate who picks up the share each week. When we were splitting the share three ways, we all met up and would decide who’d get what. Here’s the problem with that method: we would divide up individual items, and nothing really got split evenly. For instance, Ben and I would end up with a grocery bag full of greens and two tiny potatoes. Nobody was happy with this arrangement. When we split the share just with my mom, the rule is you have to take *all* of an “item” (bunch of radishes, bag of spinach, the potatoes, etc). This has worked out really well for us. There are, of course, exceptions. At the height of radish season last year, we got five bunches of radishes each week. We’d usually split those up between households.

CSA Round Up

21 Feb

Love Dove Farms

http://www.lovedovefarms.com/

Farm location:

Woodbine, MD

Pick up:

Sun 11am – 1pm, Mon 5:30pm – 7:30pm at Miller Branch Library, Ellicott City, MD

Season:

Full Season: May 10 – Oct 18 (24 weeks)

Spring: May 10 – July 26 (12 weeks)

Summer: Aug 2 – Oct 18 (12 weeks)

Share types:

Small (1-2 people) or Large (3-4 people)

Cost:

Spring or Summer Share: Small $300 ($25/wk), Large $420 ($35/wk)
Full Season: Small $600 ($25/wk), Large $840 ($35/wk)

Details:

Produce is grown without chemical pesticides or fertilizers, although not certified organic. Uses sustainable farming practices. Eggs and mushrooms may be available soon. You can check them out at the Howard County farmers markets Wednesdays & Fridays, or downtown Silver Spring on Saturday mornings.

This is the CSA we picked last year, and what we’re going with again this year. In previous years, we split a share with my mom and I still found myself buying veggies at the farmers markets every week (quite frequently from Love Dove, actually). Last year, outside of our share, I bought other veggies on three occasions (one of which was for my daughter’s birthday party, when I bought extras of what we got in our share that week). It’s not a huge diversity of produce every single week. Instead, it’s the sorts of veggies you’re used to and that we actually used up every week. (Oh, and did I mention that they all taste FANTASTIC?) We had very little spoilage! No fruit, and last year, the deer ate all the corn (although John said this year they’ve got the deer fence up and he’s getting more advice so we should hopefully seem some?)

Fresh and Local CSA

http://www.localharvest.org/a-fresh-and-local-csa-M3917/csa

Farm location: Shepherdstown, WV

Pick up:

Various. We used Silver Spring. Time range for pick up is pretty long, usually 2pm- 10pm, since it’s a drop-off style.

Season:

June – Oct (no exact dates listed, but the out-of-date website said something about 18 weeks)

Share types:

Full (full paper grocery bag) or Half (half-full paper grocery bag)

Cost:

Full: $600 ($33/wk) Half: $325 ($18/wk).

Details:

Chemical/GMO-free. Used to be certified organic, but no longer is certified (by their choice).

This was our first CSA, and they’re pretty great. Allen Balliett is an amazing guy to talk to about food politics. In addition to veggies, he also has fruit shares and meat available. For many years, we would split half a cow, half a hog, or a bunch of chickens with my mom and grandparents (they’ve also ordered veal and lamb). The meat is AMAZING quality. I cannot stress enough how awesome it is.

We stopped getting their veggies because of things on our end, not theirs. The produce is of extremely high quality, although a bit heavy on greens for our tastes (we’re not big on greens at all, sad to say). He likes to include some stuff you may not have ever tried, too, like kohlrabi, purslane, or lambsquarter (but it all comes with emailed recipe ideas!). It’s all field-packed, which means nobody washed it before it got to you, so I hope you’re comfortable with dirt. But, hey, it’s all chemical-free clean dirt at least.


Breezy Willow Farms

Farm location: West Friendship, MD

Pick up:

Various times & locations around Howard County, MD, mostly weekday afternoons.

Season:

June 9 – Nov 12 (24 weeks)

Share types:

“value added” CSA share: 8 fruits & veggies, 1 dozen eggs, 1 bread/granola, and herbs, plus a once a month extra like cheese, jam, etc.

Cost:

$920 ($38/wk)

Details:

“Value Added” CSA – in addition to veggies every week, you also get a dozen eggs and a loaf of bread or bag of granola. They DO NOT grow all their own produce. There are two ways to look at this. On the one hand, you’re less subject to how good or bad the season is. The year we were with them (2013), their blueberry crop didn’t do so well, so they brought blueberries in from elsewhere. However, this does mean you don’t always know where exactly your food is coming from. Their farms use IPM (Integrated Pest Management), which is a fancy way of saying like don’t like to spray, but they do sometimes use chemical pesticides and fertilizers.

Gorman Produce Farm

Farm location: Laurel, MD

Pick up:

Wed-Fri 2pm – 7pm at the farm

Season:

June 3 – Oct 30 (22 weeks)

Share types:

Full share (family of 4, 8-12 items per week) & Medium share (1-2 people, 5-8 items per week)

Cost:

Full: $760 ($35/wk). Medium $580 ($26/wk)

Details:

This is the first on this list that I haven’t tried as a CSA. In past years, they’ve had a farm stand (although that won’t be available for 2015), and we’ve enjoyed the produce there. Their you-pick strawberry fields are an absolute must visit. They use organic practices but are not certified organic.

In the Dairy-free Doghouse: Sarku Japan

11 Jun

This week, we stopped in at Sarku Japan, a stand-alone version of the place usually found in mall food courts. I’ve definitely eaten there before, and though I’ve noticed my stomach has not dealt with it well, I always found something other than dairy to blame.

This time, I decided to order their bento box – teriyaki chicken, salad, rice, and a California roll. I asked if they used mayonnaise in their California roll, and if it had dairy in it. The (extremely helpful) guy behind the counter offered to swap it out for a veggie roll, which was great. I sent him to check ingredients on the salad dressing, which turned out to be fine, and we went ahead with the order. We sat down to wait for our food (and get the Sprout settled in a high chair).

A moment later, the awesome guy from the front counter came back to find us. Apparently, they use milk in their teriyaki sauce! I never even thought to check, because, well, who in their right mind would use milk in a teriyaki sauce? He said it was to thicken the sauce. I asked Ben what ever happened to cornstarch.

Ultimately, we found a solution. I ended up with plain chicken with tempura sauce to dip it into. But I think its safe to say that we’re unlikely to be going back.

On the next generation

1 May

My daughter is about a year and a half old, now. We’ve never introduced her to dairy. There just never seemed to be a need; after all, I do just fine without it. She’s never been exposed through breast milk, obviously. When she hit a year old and the pediatrician gave us the okay to introduce other potential allergens, we had a conversation about dairy. Our pediatrician is amazing and has much the same opinion of dairy that I do, so when I asked her when she thought we should try introducing dairy, she said, “Never.” (I love that woman)

A week ago she informed me “teeth coming”, so I think she’s teething again. This also means we’re back to the everything in the mouth stage, which is… exhausting. Last Saturday, we were out at this big Science Expo thing (it was awesome). She was all over the floor, so there’s really no telling what she got into all day. She napped through lunch (in the middle of a They Might Be Giants concert, no less), so her beans and rice sat out unrefrigerated for an extra hour or so. On our way home, we stopped at a restaurant for dinner (because after being out of the house and walking All Day Long, I was really not interested in cooking).

All of which is to say, I have no fricken’ clue what may have made it into her mouth.

Bed time was rough, as it quite often is. But there was something different about it. For one, she was screaming, which is unusual. Occasional bouts of crying, sure, but not extended crying or screaming like this. We suddenly noticed her diaper smelled awful, so Ben checked it. You have to understand, this was probably only the second time in her life she had a… (how to phrase it delicately, since this is after all, a food blog) …messy rather than wet diaper after bed time. After she was cleaned up, I held her and took her over to sit in the chair to nurse again. There was just something about the way she was moving, the way she arched her back and groaned… I asked her if her tummy hurt, and for the first time since bedtime began, she responded, echoing “tummy hurt”. And I just Knew. I knew what she was feeling, what she was going through. I don’t know why, or what triggered it, but I knew this whole set of symptoms as being exactly what I go through after a dairy exposure. The agonizing stomach cramps, the gas and bloating, the way too soon and extremely unpleasant diarrhea. I remember describing my symptoms to a doctor and telling her that they always occur 30 minutes after eating. I remember her telling me that it just isn’t possible for it to go through the system that quickly, and that I couldn’t be right. I remember both allergists I went to telling me it’s not a “true” allergy because I don’t respond to the Ig-whatever they test for, as opposed to one of the other two alphabet soups. I remember the scratch test, where I spent an agonizing fifteen minutes in the waiting room with my dad holding my arms still so I didn’t claw off my own skin, and then being told I had “no reaction”.

I just held my little girl, and rocked her, and rubbed her back until she finally fell asleep. And I went downstairs and I cried.

Pad Thai

13 Mar

I wish I could tell you where I found this recipe. My notes, sadly, do not include that information. I found it somewhere on the Internet, so if someone knows where this recipe originally came from, I’d be more than happy to credit it properly.

It’s become a regular weeknight dinner around here. It comes together fast and is tasty and filling.

The Recipe:

8 oz. Pad Thai noodles
3 tbsp. canola oil
1 bunch green onions, chopped
¼ cup peanuts, chopped
2-4 eggs, whisked
¼ cup chicken stock
½ lime
Sauce:

  • 1/4 cup chicken stock
  • 4 cloves garlic, minced (or 1-2 tsp dried garlic granules)
  • 2 tbsp. brown sugar
  • 3 tbsp. fish sauce
  • 1 tbsp. soy sauce
  • 2 tbsp. tamarind paste (optional)

Place noodles in a large bowl and pour 6 cups of boiling water over the noodles. Stir the noodles, and then let them sit in the hot water for about 5 to 8 minutes until softened. Drain and set aside.

While waiting for the noodles, prep the other ingredients. Chop green onions, keeping green and white parts separate; mince garlic; chop peanuts, and whisk eggs.

Heat pan to medium-high heat and add remaining tbsp. of oil. Add in the chopped white parts of the green onion with a dash of salt.

Pour in whisked eggs and scramble lightly for about 30 seconds.

Push eggs to the side of the wok and then add noodles. Pour in remainder of the sauce and toss your noodles with tongs and get them completely coated in your sauce.

Once the noodles have absorbed all the sauce, add your topping (see note below) the green parts of the green onions and juice from half a lime.

Toss everything together and then taste. If it needs more sweetness, add more brown sugar; if it needs more salt, add fish or soy sauce; if it needs more tanginess, add more tamarind paste. Once you get it exactly to your liking, serve piping hot with chopped peanuts and extra lime wedges.

Toppings:

We’ve done this both with shrimp and tofu.

For shrimp: Marinate shrimp in 2 tbsp or so of sauce. Before you cook the onion and egg, saute the shrimp in the pan for 2-3 minutes or until cooked and nicely caramelized. Add back in at the end.

For tofu: Pat your tofu very dry, then slice into smaller shapes. We like half-inch cubes. Dry these again, then place in a hot pan with a thin layer of oil. If I’m doing a lot of tofu, I’ll just use our cast iron griddle. Cook on high till they start to get nicely golden brown, rotating every now and then so all sides get cooked evenly. Add to the pad thai at the end. If you’re ambitious and plan ahead well, you can marinate the tofu in your pad thai sauce the night before.

Perfect Pumpkin [Pecan] Pie

25 Aug
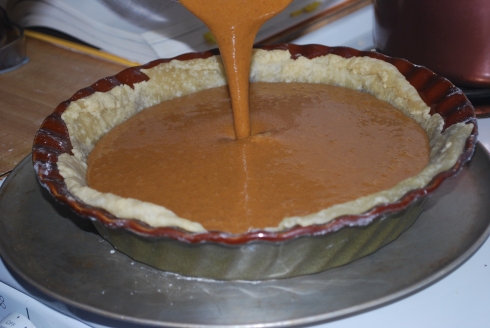
Okay, not the most appetizing photo ever, but it was devoured quickly out of the oven, so I don't have any good ones. Also, the crust went all slumpy on me.

Okay, not the most appetizing photo ever, but it was devoured quickly out of the oven, so I don’t have any good ones. Also, the crust went all slumpy on me. The pie recipe may be perfected, but the crust still needs work.

I did it! I finally found my perfect recipe. It’s easy, fast, requires very few dishes, and turns out beautifully! After years of experimentation and one disastrous evening of baking, I’ve finally worked it out.

First of all, I use fresh pumpkin. But I don’t always use traditional pumpkin. I’m particularly fond of Seminole Squash/Pumpkin, which has a lovely sweet flavor, so I usually skimp a little on the sugar to compensate. I’ve also used Crookneck squash (also sometimes labeled “Neck Pumpkin”), which tastes like canned pumpkin only way better. And there’s always ol’ reliable Pie Pumpkins, which are fine, but the other two are better. In an absolute pinch, or if your squash is slightly too small, you can always bake a sweet potato or two and use it as filler. Or, well, use a can. I guess that’s an option too.

DAIRY SUBSTITUTIONS:

The recipe calls for 2/3 c. heavy cream and 2/3 c. milk, which means you can also use 1 1/3 c. half and half. I used Mimicreme and Almond milk. If you can’t find mimicreme, you can also use 1 1/3 c. unflavored unsweetened soy creamer to replace the half and half.

Obviously, butter is replaced with margarine. We used Earth Balance for pies.

THE RECIPE:

THE CRUST:

Pre-bake your favorite 10″ pie crust, or 9″ pie crust and several ramekins for excess filling.

THE PUMPKIN:

Pick your squash.  Slice your squash in half (or more if needed) and put face down in a roasting pan with just enough water to cover the bottom of the pan. Bake at 350° for 45 minutes to an hour — the time really depends on the size of your pumpkin. If you poke the outside with a wooden spoon and it feels soft, it’s done. Take it out and let it cool until you can handle it.

Once cooled, scoop the pumpkin from the skin with a spoon or scraper. Run it through a food processor until smooth. You can refrigerate it for a week or freeze until… well, I’ve used some that was in my freezer from the previous fall, so it keeps a while when frozen.

Praline Layer (Optional):

  • 1/2 c. pecans (chopped or whole)
  • 1/4 c. brown sugar
  • 1/4 stick butter/margarine

Combine all ingredients in food processor and pulse until a coarse mixture. Spread over the bottom of pre-baked pie crust. Bake another 5 minutes.

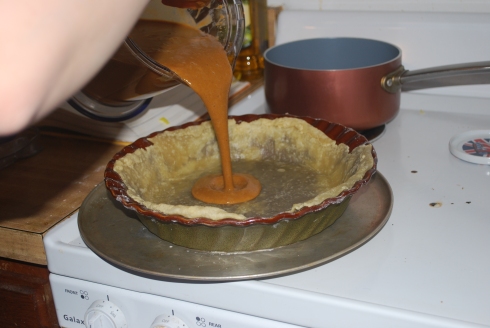
Everything goes in the blender. And then you mix it. And then you bake it. And then you eat it.

Everything goes in the blender. And then you mix it. And then you bake it. And then you eat it. Also note that in this version, I completely forgot the praline layer.

Pie Layer:

  • 2 c. (16 oz) pumpkin puree
  • 1 c. brown sugar
  • Spices:
    • 2 tsp ground ginger
    • 2 tsp cinnamon
    • 1 tsp ground nutmeg (fresh ground is best)
    • 1/4 tsp ground cloves
  • 1/2 tsp salt

Combine pumpkin, sugar, and spices in food processor or blender. Add:

  • 2/3 c. Mimicreme
  • 2/3 c. Almond milk

OR

  • 1 1/3 c. Unflavored Soy Creamer (or half & half)

Pulse a few times until mixed, then add:

  • 4 large eggs

Pulse until smooth. Pour into the pre-baked (praline lined) pie shell. Bake at 350° for 25 to 30 minutes, or until the edges begin to set but the center wiggles like jell-o. Cool at least one hour, then top with whipped cream (possibly flavored with brandy) and chopped pecans.

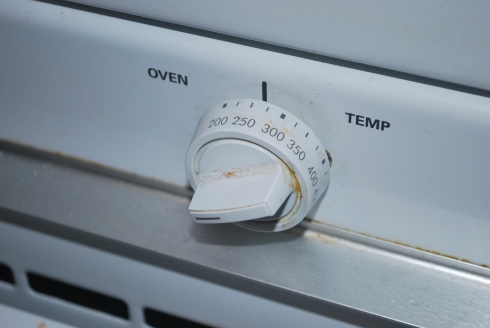
Bake at around 350&deg, which means set our crappy oven to about 225.

Bake at around 350°, which means set our crappy oven to about 225°. Also, wash your oven knobs BEFORE taking photos of them.

Chocolate Caramel Pudding

29 Apr

I’ve been told the problem with caramel is that once you learn how simple it is to make it, suddenly all your recipes with sugar become recipes with caramel. This is completely true.

The first time I made caramel, I was following a recipe for a Jerusalem kugel, which instructed me to make the caramel with a 1/4 cup oil in a shallow frying pan. This resulted in an absolutely terrifying ten minutes with the exhaust fan going and me explaining to Ben how I was absolutely certain I was going to burn the apartment down, detailing my emergency evacuation plan since we don’t have a good fire extinguisher.

Because I’m a masochist when it comes to cooking, I kept trying the same recipe, and then different recipes. Eventually, I found one that told me to make caramel in a dry saucepan. BINGO.

You start off with plain white sugar in a dry pan over medium heat, stirring constantly. First, it gets a little moist, like wet sand. Then it starts clumping more, with rough shards. As you keep stirring, eventually it starts to turn a light golden color and melt all liquidy lovely. Once it’s all melted, you’ll find it’s suddenly a very liquid caramel, and you can now proceed in one of several ways. If you add milk and cornstarch, you have pudding. See below.

DAIRY SUBSTITUTIONS:

This uses soy milk in place of milk. You can also use almond milk, coconut milk, rice milk, or anything that makes you happy. I happened to have a coupon for Silk (which I usually don’t buy because it’s the same price as the Westsoy only not organic, PLUS the unsweetened Silk soy milk is sweet), so I had a half-gallon in the fridge. Which means I used soy milk this time.

THE RECIPE:

Combine the following in a measuring cup (or whatever container suits your fancy, but I don’t like washing extra dishes):

  • 2 c. soymilk (or almond, coconut, etc)
  • 1 tsp vanilla extract
  • 1/4 tsp salt

In another bowl, mix together:

  • 3 Tbsp cornstarch
  • enough soymilk to make a thin paste

Next, put

  • 1/2 c. sugar

in a medium, dry saucepan. Stir with silicone spatula over medium heat until it turns a nice golden color and melts. As soon as it turns into caramel, CAREFULLY add the milk mixture, constantly stirring so that the caramel doesn’t solidify to the bottom in one big chunk (if it does, it’s no big deal). Add:

  • 1/4 c. chocolate chips

Keep stirring until caramel and chocolate dissolve, being careful not to let it boil over. Once it’s smooth again, add the cornstarch paste, stirring constantly. It should thicken up instantly. Pour into a large bowl or individual dishes and cool 2-3 minutes before placing into the fridge. Chill at least an hour.